Solar Energy for Home: The Complete Step-by-Step Practical Planning Guide
A practical homeowner's guide to solar energy: utility bill audits, roof inspection, system sizing, inverter selection, battery pairing, and installer bids.
By WRXNEWS Editorial Team | Published 2026-11-18 | Updated 2026-11-18
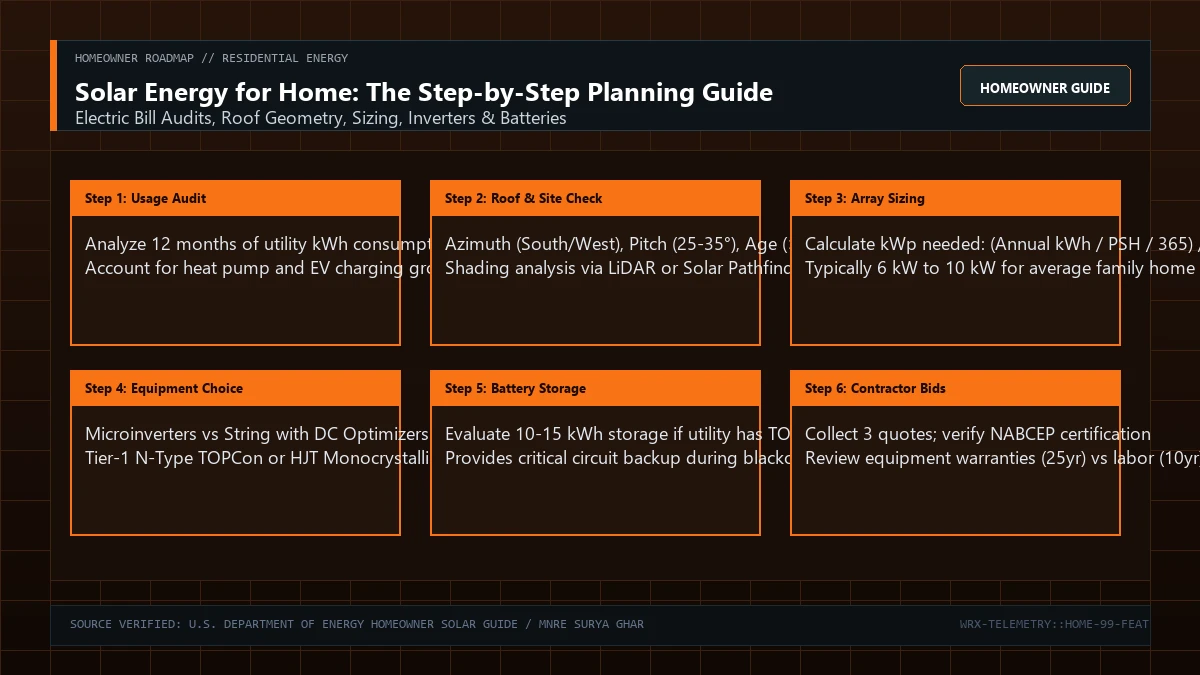
Transitioning to solar energy for your home is one of the most impactful financial and environmental investments a homeowner can make. When properly designed, a residential photovoltaic system generates clean electricity for 25 to 30 years, stabilizes household utility expenses against retail electricity inflation, and significantly reduces carbon emissions. However, navigating the residential solar market can feel daunting, with aggressive door-to-door sales tactics, conflicting equipment claims, and complicated financing structures.
Going solar successfully requires a systematic, evidence-based approach. Rather than signing the first contractor proposal that arrives at your doorstep, homeowners should treat residential solar as an engineering project: auditing historic electrical consumption, inspecting roof structural conditions, understanding inverter architectures, assessing whether battery storage makes economic sense under local utility tariffs, and vetting competitive installer quotes with critical questions. This comprehensive planning guide walks through each stage step-by-step.
Step 1: Auditing Your Historic Electricity Use and Future Needs
The first step in planning residential solar is establishing your household's baseline consumption. Review your utility electric bills for the past 12 consecutive months:
• Annual Kilowatt-Hour (kWh) Consumption: Find your total annual kWh consumption. In the United States, an average residential home consumes approximately 10,500 kWh annually (~875 kWh/month); in Europe, average household consumption is closer to 3,500 to 5,000 kWh; in urban India, it typically ranges between 3,000 and 7,200 kWh depending on air conditioning. • Seasonal Peaks: Identify seasonal demand spikes. Homes with summer air conditioning peak in July and August; homes with electric resistance heating or heat pumps peak in December and January. • Future Electrification Demands: Crucially, size your system not just for past usage, but for planned lifestyle changes over the next 3 to 5 years. Adding an electric vehicle driven 12,000 miles (20,000 km) per year adds approximately 3,000 to 4,000 kWh of annual demand. Replacing a fossil gas furnace with an air-source heat pump adds 2,500 to 4,500 kWh. Planning for these loads during initial solar design is significantly cheaper than expanding an existing system later.
Step 2: Assessing Roof Orientation, Pitch, Age and Shading
Your roof is the physical foundation of your solar installation. Evaluate four critical physical characteristics:
1. Orientation (Azimuth): In the Northern Hemisphere, true south-facing roof planes receive maximum annual solar insolation. However, west-facing roofs are increasingly valuable under Time-of-Use (TOU) utility rate structures, as they produce maximum power during high-priced late afternoon and early evening hours (16:00 to 20:00). East-facing planes provide solid morning production. North-facing roofs generally produce 30% to 40% less energy and are rarely economically viable unless roof pitch is very low (<10°). 2. Pitch (Slope): Ideal roof pitch ranges between 25° and 35° (roughly 6/12 pitch), allowing rain to naturally wash away dust while maximizing perpendicular sun exposure throughout the year. 3. Structural Integrity and Roofing Age: Asphalt shingle roofs last 20 to 25 years; metal roofs last 40 to 60 years. Because solar panels have an operational lifespan of 25 to 30 years, if your asphalt shingle roof is more than 12 to 15 years old, replace the roof shingles before installing solar. Removing and reinstalling a solar array to replace an old roof later costs $2,000 to $4,000 in labor. 4. Shading Analysis: Trees, chimneys, plumbing vents, and neighboring buildings cast shadows. Qualified installers use drone LiDAR or optical devices (like a Solar Pathfinder) to model solar access percentages. If shading exceeds 20% on a roof plane, trimming trees or utilizing microinverters is essential.
Step 3: Sizing Your Array (kWp) and Selecting Module Technology
To calculate the required system capacity (kWp) for your home, apply the formula:
$\text{Target System (kWp)} = \frac{\text{Annual Consumption (kWh)}}{\text{Local Peak Sun Hours (PSH)} \times 365 \times \text{Performance Ratio (PR)}}$
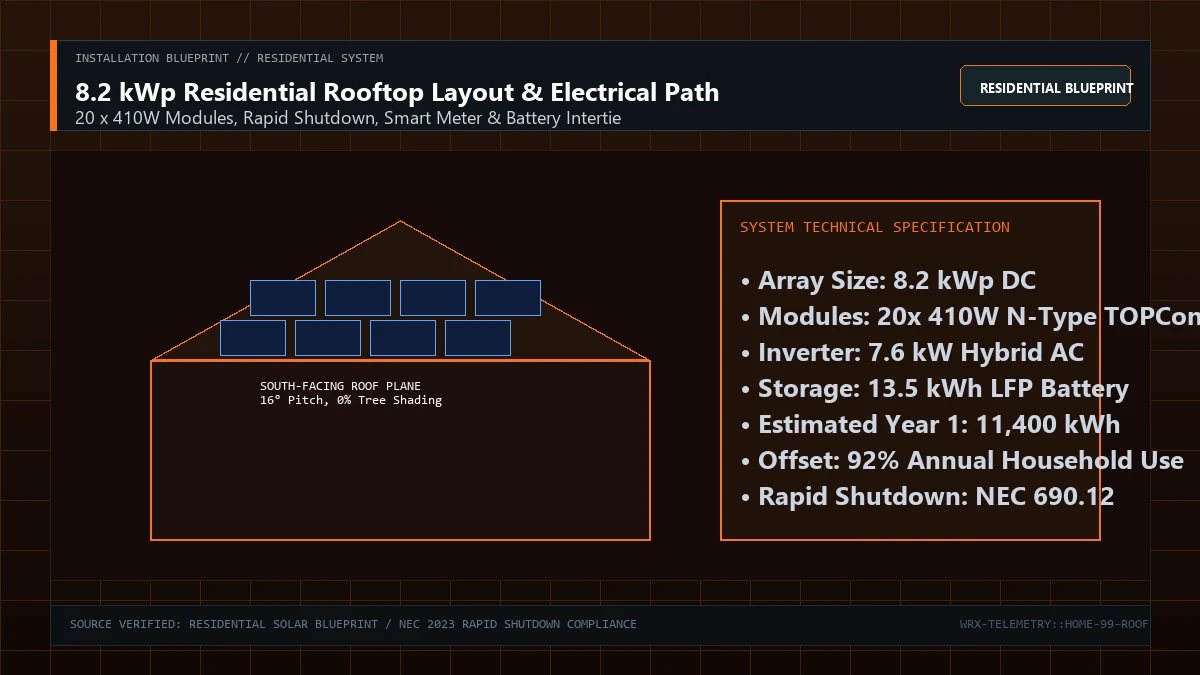
For a home consuming 10,000 kWh annually in an area with 4.5 Peak Sun Hours and an 80% Performance Ratio (0.80): $\text{Target kWp} = \frac{10,000}{4.5 \times 365 \times 0.80} = \frac{10,000}{1,314} \approx 7.6\text{ kWp}$
With modern residential modules rated at 410 Watts each, a 7.6 kWp array requires approximately 19 modules ($7,600\text{ W} / 410\text{ W} = 18.5$), occupying roughly 40 square meters (430 square feet) of usable roof area.
Module Technology: Insist on Tier-1 monocrystalline modules featuring N-type TOPCon or Heterojunction (HJT) cells. Avoid outdated P-type polycrystalline modules. Ensure the manufacturer provides a 25-year product warranty (materials and workmanship) alongside the standard 25-year power output degradation guarantee (ensuring >85% nameplate power output at year 25).
Step 4: Choosing Your Inverter Architecture: String vs Microinverters
Solar panels generate direct current (DC) electricity; your home runs on 120V/240V alternating current (AC). You have two primary equipment architectures:
1. String Inverter with DC Optimizers (e.g., SolarEdge, Fronius, SMA): • Architecture: Panels are wired in series to a single central inverter mounted near your main electrical service panel. Small electronic DC optimizers are mounted beneath each module on the roof. • Advantages: Lower equipment cost (typically $0.15–$0.25/W cheaper); central inverter is accessible for servicing at ground level; excellent round-trip efficiency for DC-coupled home batteries. • Limitations: High-voltage DC wiring runs from roof to ground; central inverter typically carries a 10- to 12-year warranty and may require replacement once during system lifespan.
2. Microinverter Architecture (e.g., Enphase): • Architecture: A small, sealed microinverter is attached directly underneath every individual panel on the roof, converting DC into household 240V AC immediately. • Advantages: Maximum resilience and shade mitigation—if one panel is soiled or shaded by a chimney, adjacent panels continue operating at 100%; module-level monitoring; zero high-voltage DC on the roof; 25-year manufacturer warranty matching module lifespan; easy system expansion by adding panels incrementally. • Limitations: Slightly higher upfront equipment cost; if a microinverter fails, replacement requires roof access.
Step 5: Evaluating Home Battery Storage and Emergency Backup
A home solar battery (typically 10 kWh to 15 kWh capacity using Lithium Iron Phosphate chemistry) serves two distinct purposes:
1. Economic Self-Consumption Optimization: Under traditional 1:1 net metering, the utility acts as a free virtual battery—you export excess midday solar power at full retail value and draw it back at night for free. In that regulatory regime, home batteries offer little financial return. However, under modern Time-of-Use (TOU) rates or reduced-export policies (such as California's NEM 3.0, where exported solar is credited at wholesale rates averaging ~$0.05–$0.08/kWh while evening grid power costs $0.35–$0.55/kWh), a battery saves substantial money by storing cheap midday solar to power the home during evening peak rate windows.
2. Blackout Protection and Resilience: Standard grid-tied solar systems automatically shut down during grid outages (anti-islanding protection to prevent backfeeding power into downed power lines where utility linemen are working). A battery paired with an automatic transfer switch (ATS) creates a microgrid in your home, powering critical circuits (refrigeration, lighting, internet, water pumps) continuously through prolonged power outages.
Step 6: Understanding Net Metering, Permits and Government Incentives
Government policies and local utility regulations heavily impact solar economics:
• Tax Credits and Rebates: In the United States, the federal Section 25D Investment Tax Credit (ITC) allows homeowners to deduct 30% of the total installed cost of solar and battery storage from federal income taxes through 2032. In India, the PM Surya Ghar: Muft Bijli Yojana provides direct subsidies up to ₹78,000 for residential rooftop installations up to 3 kW. In Europe, many countries offer zero-VAT rates on solar equipment alongside feed-in tariffs. • Permitting and Interconnection: Before installation can begin, your contractor must submit architectural plans to the local building department for structural/electrical permits and submit an interconnection application to your electric utility. Once installed, the city inspector conducts a final inspection, and the utility issues 'Permission to Operate' (PTO) and installs a bi-directional smart meter.
Step 7: Vetting Installer Quotes: 10 Critical Questions to Ask
Obtain at least three competitive quotes from qualified local and regional contractors. When reviewing bids, ask these essential questions:
1. Are your electricians NABCEP-certified (North American Board of Certified Energy Practitioners) or equivalent local licensed master electricians? 2. What is the all-in cash price per Watt ($/W)? (Compare bids on pre-incentive $/W rather than confusing monthly loan payments). 3. Are you a direct installer or a sales broker subcontracting the installation to third parties? 4. What specific module, inverter, and racking brand and models are specified in the contract? 5. What is the length and scope of your company's workmanship warranty (separate from manufacturer equipment warranties)? (Look for at least 10 years covering roof penetrations against leaks). 6. How does your performance guarantee work if the system produces less electricity than estimated in year 1? 7. Who handles utility interconnection paperwork, HOA approvals, and city building permits? 8. Does the proposal include any required electrical service panel upgrades (e.g., upgrading from 100A to 200A service)? 9. What are the cash vs financing terms? (Beware of solar loans with low APRs that hide hefty 20% to 35% upfront dealer fees added to the principal balance). 10. How will our system be monitored, and who responds if an inverter sends a fault code?
Frequently Asked Questions
How long do residential solar panels last?
Modern Tier-1 monocrystalline solar panels last 25 to 30 years or more. Manufacturers guarantee that panels will still produce at least 85% of their original rated power output after 25 years of continuous operation.
Will solar panels still work during a power outage?
Standard grid-tied solar systems shut down automatically during a blackout for grid safety. If you want solar power during an outage, you must install an energy storage battery paired with an automatic transfer switch (ATS) to island your home safely.
What is the average payback period for home solar panels?
Payback periods typically range between 5 and 9 years depending on local electricity rates, solar irradiance, net metering compensation, and government incentives. Because panels operate for 25+ years, homeowners enjoy 15 to 20 years of essentially free electricity after recouping initial investment.
Is it better to lease or buy solar panels?
Buying solar panels (either with cash or a standard bank loan) is significantly better financially because you retain all tax credits, increase home property value, and achieve higher 20-year net savings. Leasing or PPAs offer zero upfront cost but provide lower financial returns and can complicate home sales.